Camera Angle
The First step is Understanding what your going to be presenting and capturing it from the best angle. This can vary depending on what you wish to show off. In my case i want to show off as much of the assets as i can. But you might just want to show off the textures normal map or texture detail these will all require there own thought as to the angle.
Environment and Lighting
Now that i know the angle next is to great an environment that compliments what I'm looking to show off. So the first thing is Lighting the subject. I want as much of the object shown as i can so ill be using a simple Hemisphere light, this will cast even light over the scene showing off all of the object. The next thing to make up the environment is a Floor, Room or stage. I like to use what is known as an Infiniroom, a room that goes on forever and is sterile and clean.To create an Infiniroom, simply create a Large circle as the floor of the room, and then Extrude the Walls up to the height you desire. This can be changed later for a variety of different situations.
Next move the room so that the object is inside and sits on the floor grounding it, giving the viewer a sense of its place in 3D space. This can be re-enforced by use of a shadow too. Now you might be wondering why i said to position the object in the camera first. This is just my method as i make the environment around the camera view. But its all about preference, you can create the infiniroom first, place your assets inside and then work out a good camera angle both ways are fine.

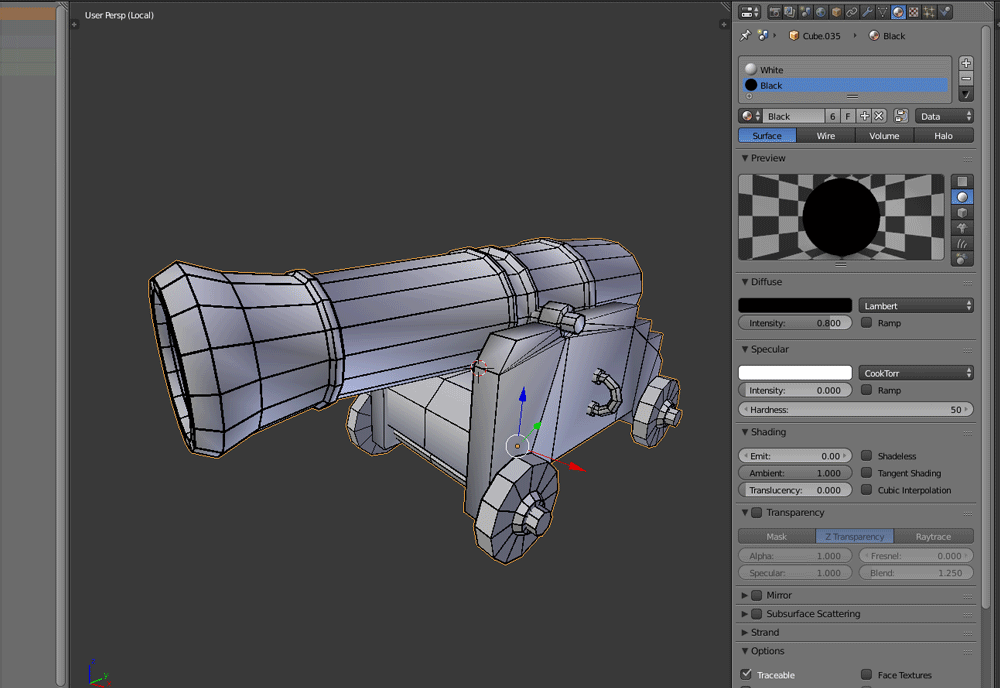
Wire Frame Rendering
For the last step is Rendering. For this i want two different renders. One of the Model in wire frame and another of the Model with textures applies. For each of these my environments are gonna vary slightly so we need to do is set up the materials differently for each render.
To do this in blender you need to apply a modifier to your model this is temporary and will need to be deleted later. In the Modifiers stacker there is a modifier called Wire frame. Select this and you'll notice your model changed and looks like a spiderweb. This is the wireframe, in the modifier settings we want to uncheck "Replace Original"and change the material Offset to "1". You will now see your Model and its wireframe but they are the same colour. The next thing we need to do it change its materials.
With the model selected we want to apply a white material to it as the base for the model. (This will be "Material Offset 0") With the white material applied we next want to add a second material this will be used by the modifier to render the wireframe (This will be "Material Offset 1"). I will make this second material Black as it contrast well on top of the white.
Now hit render and you have a Wireframe render of your Model. Just save the image and you can move on.

Texture Rendering
This next step is pretty simple. I will be using blender render as it has all the needed shader parameters that to get a accurate game engine like render. You may use cycles if you wish i find blender render faster for a quick presentation render.With the object to be rendered selected I will add a new material (If there are anyother materials applies Such as the ones used for rendering the wire frame delete them first by using the - button)
after creating the material we want to jump over to the Texture panel and import all the textures we wish to use. In my case i will only be using a the diffuse or Albedo map. Next im going to adjust the mapping settings to use the UV coordinates and then ill jump back to the materials panel and turn down the specularity.
Now hit render and you have a Textured render of your Model. Save once again you are done.
Final Tips
When you know what you want to show off finding the right camera angle becomes quite easy. Remember framing and simple compositional rules can help a lot too. (i.e. Golden Ratio, Rule of Thirds)
With materials the classic less is more rule can help so much. If you have Normal maps, Spec maps and every other map possible applied and your getting bad results try removing all the extra maps and render just the diffuse. This is about presentation, unless your showing off how the lighting effects the texturing you can probably leave out all the complected stuff and get a nicer and cleaner result that way.
Finally dont limit yourself to using just one piece of software to obtain a nice render, remember you can always tweak things in photoshop afterwards. (i.e. Vinyette, Colour Correction, Value Balance)

No comments:
Post a Comment